Bootstrap Image Resize
Overview
Select your pictures in to responsive behaviour ( with the purpose that they never turn into larger in size than their parent features) and also add in light-weight styles to all of them-- all via classes.
No matter just how strong is the text present within our webpages undoubtedly we require a few as strong images to back it up making the content really glow. And given that we are really in the smart phones age we additionally desire those images functioning appropriately for them to exhibit absolute best with any screen size considering that no one likes pinching and panning around to become able to actually view exactly what a Bootstrap Image Resize stands up to show.
The people responsible for the Bootstrap framework are effectively informed of that and directly from its opening the most famous responsive framework has been providing very easy and effective resources for ideal appearance as well as responsive behavior of our picture components. Here is the way it work out in recent edition.
Differences and changes
Within contrast to its antecedent Bootstrap 3 the fourth version utilizes the class .img-fluid instead of .img-responsive when it used to be. The things this class implies is the Bootstrap Image Responsive is going to fill the full width of its container sizing upward or down accordingly to sustain its own proportions. And so for pioneers-- ensure that you add in .img-fluid to your <div class="img"><img></div> features if incorporating them into Bootstrap 4 powered website pages.
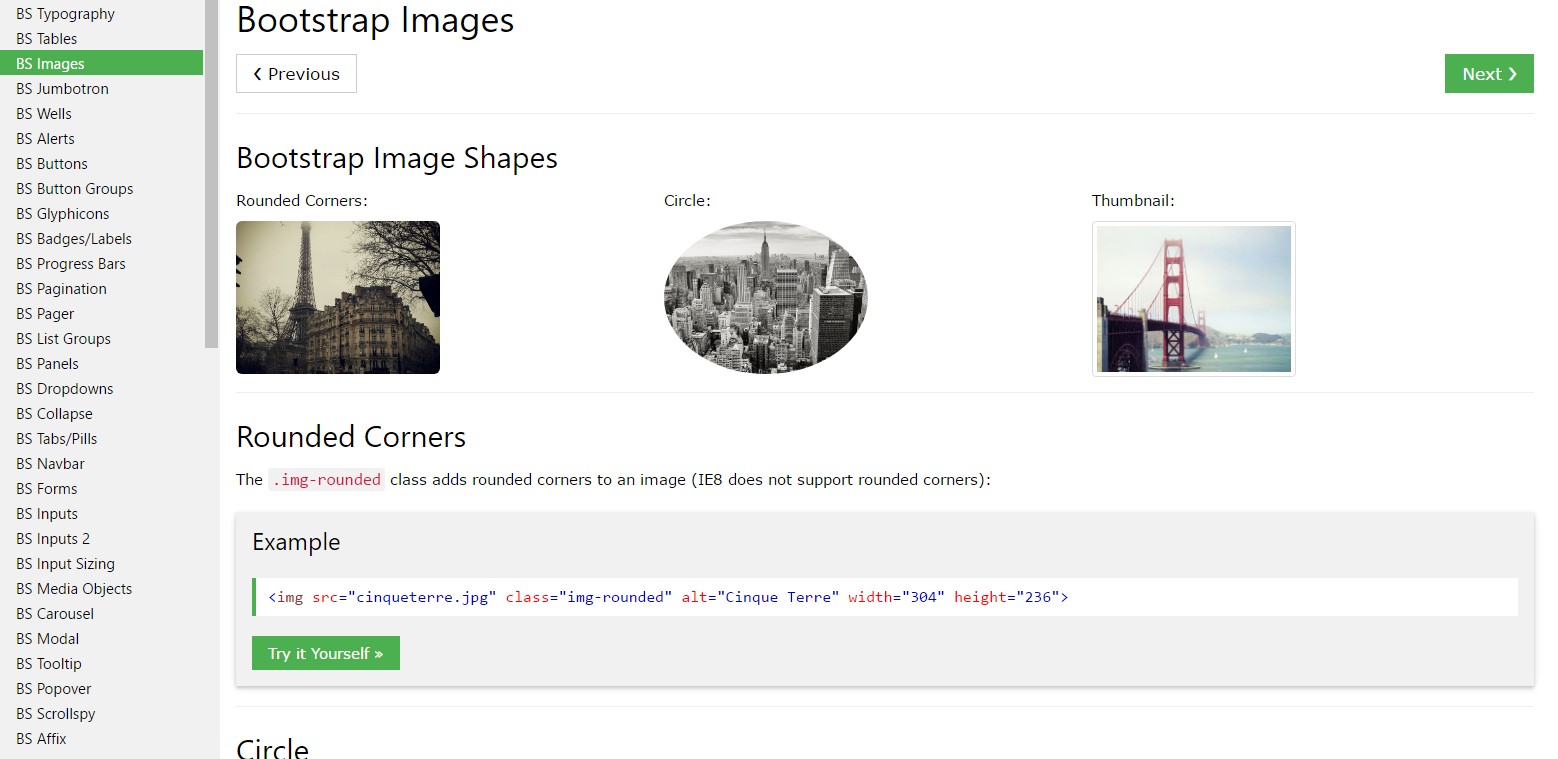
{ You can likewise take advantage of the predefined styling classes generating a certain illustration oval using the .img-cicrle class, display with a refined curved edge along with a delicate offset out of the actual content utilizing the .img-thumbnail class or simply slightly round the sharp edges with the .img-rounded class to receive a little friendlier appearance.
Responsive images
Pics in Bootstrap are actually generated responsive using .img-fluid. max-width: 100%; plus height: auto; are related to the pic so that it sizes together with the parent element.

<div class="img"><img src="..." class="img-fluid" alt="Responsive image"></div>SVG images and IE 9-10
In Internet Explorer 9-10, SVG pics having .img-fluid are overmuch sized. To repair this, add in width: 100% \ 9; where wanted. This solution incorrectly sizes other illustration structures, so Bootstrap does not utilize it instantly .
Image thumbnails
As well as our border-radius utilities , you may employ .img-thumbnail to provide an image a rounded 1px borderline appearance.
<div class="img"><img src="..." alt="..." class="img-thumbnail"></div>Aligning Bootstrap Image Placeholder
When it comes to arrangement you can take advantage of a few pretty strong tools such as the responsive float supporters, text message positioning utilities and the .m-x. auto class as follows :
The responsive float devices could be chosen to position an responsive image floating right or left and modify this placement depending on the dimensions of the existing viewport.
This particular classes have involved a number of modifications-- from .pull-left and .pull-right inside the earlier Bootstrap 3 version to
.pull- ~ screen size ~ - left and .pull- ~ screen size ~ - right in Bootstrap 4 up to alpha 5 and at last in the sixth alpha-- to .float-left and also .float-right switching out the .float-xs-left and .float-xs-right classes by having the dropping of the -xs- infix leaving the other .float- ~ screen sizes md and up ~ - lext/ right as they remain in Bootstrap 4 alpha 5.
Centering the illustrations in Bootstrap 3 used to happen utilizing the .center-block class. Located in the latest version of the framework this stuff now happens through the .m-x. auto class together with .d-block in order to establish the pic to show as a block.
Straighten pics utilizing the helper float classes or message positioning classes. block -level images can be focused utilizing the .mx-auto margin utility class.
<div class="img"><img src="..." class="rounded float-left" alt="..."></div>
<div class="img"><img src="..." class="rounded float-right" alt="..."></div>
<div class="img"><img src="..." class="rounded mx-auto d-block" alt="..."></div>
<div class="text-center">
  <div class="img"><img src="..." class="rounded" alt="..."></div>
</div>
Also the text alignment utilities might be used applying the .text- ~ screen size ~-left, .text- ~ screen size ~ -right and .text- ~ screen size ~ - center to the parent element in which the actual <div class="img"><img></div> feature has been wrapped. A brand new feature in the current alpha 6 build of the Bootstrap 4 again concerns the losing of the -xs- position-- and so in case you like to for instance centralize an image globally-- for all types of scales together with the text utilities just use the .text-center class.
Conclusions
Commonly that's the way you are able to incorporate simply just a number of easy classes in order to get from usual images a responsive ones along with the most recent build of the best famous framework for setting up mobile friendly website page. Now everything that's left for you is choosing the correct ones.
Check out several video tutorials regarding Bootstrap Images:
Related topics:
Bootstrap images official documents
W3schools:Bootstrap image short training
Bootstrap Image issue - no responsive.
